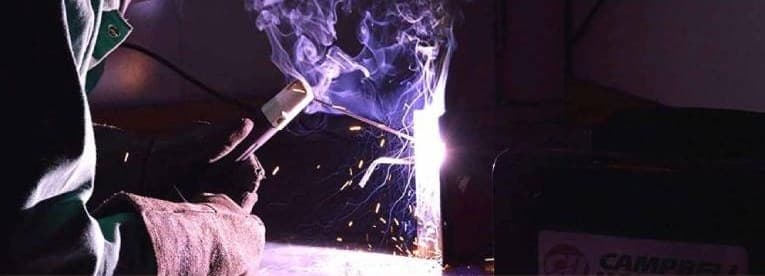
To use a stick welder: set the polarity the rod calls for, set the amperage to roughly one amp per thousandth of an inch of rod diameter, scratch the electrode like a match and lift it about a rod-thickness off the plate, then drag it along the joint at a slight angle, keeping that gap constant. Everything else is detail on those four things.
What stick welding is, and when to choose it
Stick welding - shielded metal arc welding, SMAW - runs an arc between a flux-coated consumable electrode and the work. The flux burns to make a gas shield and leaves a crust of slag over the bead. There is no gas bottle, no wire feeder and no regulator, which is exactly why it is still the process of choice outdoors and on rusty farm steel. If you are choosing between processes rather than learning one, the four arc processes compared is the place to start, and MIG against TIG covers the two you would otherwise pick.
Choose stick when the metal is dirty, painted or rusty, when you are working outside where wind would blow a gas shield away, when the joint is thicker than about 1/8 inch, or when you need to carry the machine to the work. Do not choose it for sheet metal, aluminium, or anything that has to look good without a grinder.
The safety that comes before anything else
A stick arc is a bright ultraviolet source about eighteen inches from your face, and the rod is live whenever the machine is on. Two things are worth getting exactly right rather than approximately - the shade of your lens, and what you are wearing. Our guide to flame-resistant shirts explains what the labels on the clothing actually certify, which is not what most of them appear to say.
Filter shade for stick welding, by amperage
| Arc current | OSHA minimum shade | ANSI and AWS suggested |
|---|---|---|
| Under 60 A | 7 | not listed |
| 60-160 A | 8 | 10 |
| 161-250 A | 10 | 12 |
| 251-550 A | 11 | 14 |
The minimum column is the law; the suggested column is what you will actually be able to see through comfortably. Most home stick welding sits at 90-140 A, which means a shade 10.
- Dry gloves, and dry everything else. Damp leather conducts, and stick welding is the process most likely to put the electrode against your forearm
- Cover every inch of skin. A sunburn from an arc is a sunburn, and it comes through a loose collar
- Earth clamp on the workpiece itself, not on the bench top. Current that has to find its way through a vice will find it through the bearings
- Ventilate, and keep your head out of the plume. Manganese in mild steel fume is the reason, not the smell
- Nothing flammable within 35 feet, and check again after you finish - slag stays hot for a surprisingly long time
Setting the machine: polarity first, then amperage
Polarity is the setting people get wrong, because the machine will happily run on the wrong one and simply weld badly. DC electrode positive - DCEP, sometimes called reverse polarity - puts about two thirds of the heat into the electrode and gives deeper penetration. DC electrode negative puts the heat into the work and is used for thin material. AC alternates between them, and is the only option on a basic buzz-box; what AC and DC actually change goes further into that.
For amperage, the rule of thumb is one amp per thousandth of an inch of electrode diameter: a 1/8 inch rod is 0.125 inch, so start near 125 A. It is a starting point, not an answer. The manufacturer prints a range on the box, and that range is narrower and more trustworthy than any rule.
Which rod: 6010, 6011, 6013 or 7018
The first two digits are the tensile strength in thousands of psi - 60 means 60,000 psi. The last two say what position it runs in and what the flux is made of, which reading a rod's classification number works through in full. Four rods cover almost everything a small shop does.
The four rods, and what each is for
| Rod | Polarity | What it does | Watch out for |
|---|---|---|---|
| E6010 | DC electrode positive only | Deepest penetration, cuts through rust and paint. The pipeline root rod | Will not run on AC at all |
| E6011 | AC or DC electrode positive | The 6010 you can run on an AC machine | Rougher bead, more spatter |
| E6013 | AC or DC, either polarity | Easiest to strike and run. The learning rod, and fine for general repair | Shallow penetration - not for structural work |
| E7018 | DC electrode positive or AC | Low hydrogen, x-ray quality, the structural rod | Absorbs moisture from the air. Needs a heated rod oven |
Amperage by diameter, from the makers' own data sheets
| Rod | 3/32 inch | 1/8 inch | 5/32 inch | 3/16 inch |
|---|---|---|---|---|
| E6010 (Lincoln Fleetweld 5P+) | 40-70 A | 75-130 A | 90-175 A | 140-225 A |
| E6011 (Hobart 335A) | 60-90 A | 80-125 A | 130-160 A | 160-190 A |
| E6013 (Lincoln Fleetweld 37) | 75-105 A | 110-150 A | 160-200 A | 205-260 A |
| E7018 (Hobart 7018 XLM) | 70-110 A | 90-160 A | 110-230 A | 190-300 A |
Those ranges are one manufacturer's, not a universal truth - two brands of 7018 can differ by twenty amps at the same diameter. Read the box your rods came in, and use the table above to know roughly where you should be.
How to use a stick welder, step by step
Watch the arc being struck before you read the steps - it is one of the few things that is genuinely quicker to see than to read. Then work down the list.
- Grind or wire-brush the joint to bright metal on both sides. Stick tolerates dirt better than any other process, and still welds better without it
- Clamp the earth lead directly to the workpiece, as close to the joint as you can get it
- Set polarity for the rod you are using. DCEP for 6010 and 7018; AC or DC for 6011 and 6013
- Set the amperage from the box, or one amp per thousandth of an inch as a start
- Put the rod in the holder at about 90 degrees to the jaws, with two inches of bare stub gripped
- Drop your hood. Strike the arc by scratching the rod along the plate like a match, or by tapping it straight down and lifting
- Lift immediately to an arc length about equal to the rod's core diameter - a 1/8 inch rod, a 1/8 inch gap. Lincoln's own guidance for thin work is an eighth of an inch or shorter
- Tack both ends of the joint and the middle before you run anything. Steel moves as it cools, and a tacked joint moves less
- Tilt the rod 5 to 15 degrees away from the direction of travel and drag it towards you. Stick is a drag process; pushing it buries the slag in the bead
- Travel at the speed that keeps the puddle about twice the rod diameter wide. If the bead piles up, you are too slow; if it is thin and ropey, too fast
- At the end, pull back into the crater for a moment before lifting, so it fills rather than leaving a pit
- Chip the slag off with a hammer and wire-brush it before the next pass. Slag left between passes becomes an inclusion, and an inclusion is a crack waiting for a load
The four things that decide whether the bead is any good
Arc length, angle, speed, amperage
Every stick welding fault traces back to one of these four. Change one at a time.
- Arc length
- equal to the rod's core diameter. Too long and you get spatter, porosity and a wide flat bead; too short and the rod sticks
- Travel angle
- 5 to 15 degrees, dragging. More than that and the arc force pushes the molten slag ahead of the puddle where it gets trapped
- Work angle
- 45 degrees into the corner on a fillet, so both plates get the same heat
- Travel speed
- the puddle should stay about twice the rod's diameter. This is the one beginners get wrong in both directions within the same bead
- Amperage
- within the maker's range, then adjusted by what the bead tells you. Undercut and heavy spatter mean too high; a rod that sticks and a bead that sits on top mean too low
Reading the bead: what went wrong and why
Stick welding faults
| What you see | Why | Fix |
|---|---|---|
| The rod sticks to the plate | Amperage too low, or you paused on contact | Twist the holder to snap it free, then raise the amps 10 A |
| Heavy spatter | Amperage too high, arc too long, or the wrong polarity | Check polarity first - it is the one that surprises people |
| Porosity, small holes in the bead | Damp rod, dirty metal, or too long an arc | Dry rods, clean to bright steel, shorten the arc |
| Undercut, a groove along the toe of the weld | Too much amperage, travelling too fast, or the wrong work angle | Lower the amps and slow down |
| Slag trapped in the weld | Arc too long, weaving too wide, or not chipping between passes | Chip every pass, keep the weave under three rod diameters |
| The arc wanders off the joint on DC | Arc blow - the magnetic field pulling the arc | Move the earth clamp, weld towards it, or switch to AC |
Frequently asked questions
What amperage should I use on a 1/8 inch rod?
Start at about 125 A - roughly one amp per thousandth of an inch of rod diameter - then check it against the range on the box. For 1/8 inch, Lincoln give 110-150 A for their 6013 and Hobart give 90-160 A for 7018 XLM. Adjust from what the bead does, not from what the dial says.
Can I stick weld on AC?
Yes, with the right rod. E6011 and E6013 run on AC. E7018 has an AC-compatible version. E6010 will not run on AC at all - it needs DC electrode positive. A basic AC-only machine is not a limitation for general repair work; it rules out 6010 and it makes the arc a little harsher.
Why does my rod keep sticking?
Amperage too low is the usual answer. The second is hesitating at the moment of contact: the strike is a scratch or a tap, not a press. Raise the current 10 A at a time until the arc establishes without sticking, and if that pushes you past the top of the rod's range, the rod is too large for the machine.
How thick can a stick welder handle?
A 140 A machine will do single-pass welds up to about 3/16 inch and thicker with multiple passes and a bevel. Thickness is really a duty cycle question rather than an amperage one - a machine that can reach 200 A for 20% of ten minutes will not finish a long structural joint without stopping.
Do I need to grind before stick welding?
Stick is the one process that tolerates rust and mill scale, which is why it is used on farm equipment and outdoors. It still welds better on clean metal, and on anything that matters - anything that will carry a load - grind to bright steel. Paint and galvanising must always come off, the second because the fume is genuinely dangerous.
Sources
- Lincoln Electric - Stick Electrode Welding Guide (PDF): amperage ranges and polarity for Fleetweld 5P+, 35 and 37
- Hobart Brothers - 335A (E6011) data sheet (PDF)
- Hobart Brothers - 7018 XLM data sheet (PDF): amperage, and the oven and rebake temperatures
- OSHA - Eye Protection against Radiant Energy during Welding (PDF): the shade table
- ANSI/AWS Z49.1:2021, Safety in Welding, Cutting and Allied Processes (free PDF)
- TimWelds - How to Strike an Arc: Stick Welding Basics for Beginners
In short
Stick welding is four variables and one habit. The variables are polarity, amperage, arc length and travel - get those inside the range the rod's maker prints and the bead will be sound. The habit is chipping the slag before every pass. Almost every failed stick weld anyone brings back to a shop is either slag that was welded over or a 7018 that spent the winter in a damp van.