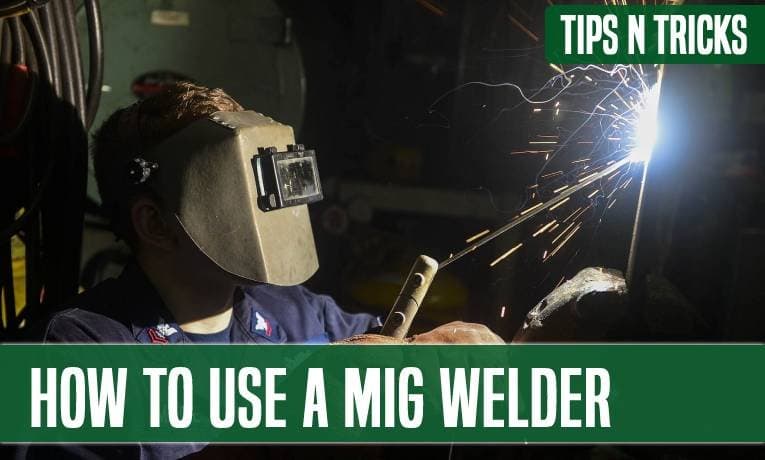
MIG is the process most people learn first, and for good reason: the machine feeds the wire for you, so you have one less thing to think about while you are learning to read a weld pool. It is forgiving enough for a first weekend in the garage and capable enough to build a trailer.
This guide takes you from an unopened machine to a bead you would be willing to show someone — gas, wire, polarity, settings, gun angle, travel speed, and how to look at a finished weld and know what to change. If you are still deciding between processes, our comparison of MIG and TIG welding is the place to start.
What MIG Welding Actually Is
The formal name is gas metal arc welding, or GMAW. A motor feeds a continuous solid wire through the gun; a copper contact tip passes welding current into that wire; an arc forms between the wire and your workpiece and melts both together. At the same time, shielding gas flows out of the nozzle and pushes the surrounding air away from the molten pool.
That last part is the whole point. Molten steel exposed to the oxygen and nitrogen in air turns porous and brittle. The gas is not there to help the arc — it is there to keep the atmosphere out.
When was MIG welding invented?
The consumable continuously-fed electrode idea dates to General Electric in the 1920s, but MIG as you would recognise it arrived in 1948, when the Battelle Memorial Institute developed the wire-feed mechanism still used today (GMAW development timeline). Carbon dioxide shielding followed in 1953 and short circuit transfer in 1958–59, which is what finally made the process practical for thin material and small shops. TIG is the process that came out of the Second World War; MIG came after it.
Why it is called MIG when the gas usually is not inert
“MIG” stands for metal inert gas, and on aluminium that is literally true — you run pure argon. On steel, which is most of what most people weld, you are running carbon dioxide or an argon/CO₂ blend, and CO₂ is chemically active, not inert. Europe calls that MAG. The name stuck anyway. It matters only because it explains why you cannot just put any bottle on any job.
What are the four metal transfer modes?
How the metal crosses the arc changes with voltage and wire speed. You do not have to memorise this, but knowing which mode you are in explains most of what you hear and see.
Metal transfer modes
| Mode | Roughly when | What it sounds and looks like |
|---|---|---|
| Short circuit | Low voltage and wire speed; thin material | Crackling, like frying bacon. The wire physically touches the puddle hundreds of times a second. Coolest mode, least penetration, easiest to control out of position. |
| Globular | Between short circuit and spray | Large irregular drops, heavy spatter. Generally a mode you pass through rather than aim for. |
| Spray | High voltage with an argon-rich mix | A fine steady hiss. A cone of tiny droplets, almost no spatter, deep penetration. Flat and horizontal only — the puddle is too fluid otherwise. |
| Pulsed spray | Machine pulses between a high and low current | Spray-quality welds at a lower average heat, so it works out of position and on thinner material. Needs a machine that supports it. |
What Safety Gear Do You Need for MIG Welding?
A MIG arc puts out enough ultraviolet light to sunburn you through a thin shirt in minutes, and it throws molten metal several feet. None of this gear is optional.
What shade lens do you need for MIG welding?
A welding helmet protects your eyes and face from the arc. “At least shade 10” is the advice you will see everywhere, and it is only half right — the correct shade depends on how much current you are running.
Recommended lens shade for MIG (GMAW)
| Welding current | Shade range |
|---|---|
| Under 60 A | 7 – 10 |
| 60 – 160 A | 10 – 12 |
| 160 – 250 A | 11 – 13 |
| 250 – 500 A | 13 – 15 |
Bands from the American Welding Society’s welding lens shade chart; the fuller safety standard, ANSI Z49.1, is published free by AWS. Start at the darker end of the band and step lighter until you can see the puddle clearly without straining. An auto-darkening helmet that lets you set the shade is worth the money the first time you tack something one-handed.
What should you wear to MIG weld?
Cover every inch of skin, and cover it in something that will not melt. Synthetics such as polyester, nylon, acetate and rayon can ignite or melt onto you. Untreated cotton will burn. What you want is flame-resistant fabric — either FR-treated cotton or an inherently flame-resistant blend, rated to NFPA 2112 in the United States. We cover how FR clothing actually works in more detail, and our guides to the best welding shirts and best pants for welding go through specific options.
- Leather gloves — MIG gloves are thinner than stick gloves so you keep some dexterity
- Leather boots over the trouser cuff, never inside it, so sparks cannot drop in
- No cuffs and no open pockets facing up; both catch hot metal
- Safety glasses under the helmet, because you will lift the hood to chip and grind
What fire extinguisher do you need for welding?
Sparks travel further than you think — the working assumption in industry is 35 feet, and further downhill. Clear combustibles out of that radius or cover them.
Setting Up the Machine
Which MIG wire should you use?
For mild steel there are two wire classifications you will meet, and the difference between them is deoxidisers — the elements that let the wire cope with contamination.
- ER70S-3 — general purpose, for clean material
- ER70S-6 — more deoxidisers, so it handles mill scale, light rust and less-than-perfect prep. If you are buying one spool, buy this one
Diameter follows material thickness — thinner wire concentrates less heat, which is what you want on sheet metal (Miller: the basics of MIG welding mild steel).
Wire diameter by material thickness
| Wire | Best suited to |
|---|---|
| 0.023″ / 0.024″ | Sheet metal and thin material, where the goal is keeping heat down |
| 0.030″ | The best all-round choice — covers the widest range of thicknesses |
| 0.035″ | Thicker material needing more heat |
| 0.045″ | Heavy plate, usually on larger machines |
There is also self-shielded flux-cored wire, which carries its own shielding in the core and needs no gas bottle. That makes it the practical choice outdoors or in wind, where shielding gas simply blows away. Strictly it is a different process — FCAW rather than GMAW — and it runs on the opposite polarity, which is the part people forget.
Which shielding gas should you use for MIG?
Shielding gas for MIG
| Gas | Use it for | Trade-off |
|---|---|---|
| 75% argon / 25% CO₂ (“C25”) | General mild steel work | Least spatter, best-looking bead, least likely to burn through thin material. The default for a home shop. |
| 100% CO₂ | Mild steel where penetration matters more than looks | Deeper penetration and cheaper, but noticeably more spatter and a rougher bead. |
| 100% argon | Aluminium | Required — aluminium will not run on a CO₂ mix. |
| Argon with 1–2% oxygen or higher argon tri-mixes | Stainless steel | Better wetting and appearance on stainless. |
Set flow to about 20 cubic feet per hour for light work, and go up toward 25–30 only if you are welding in a draught or with a long stick-out. More gas is not better gas: too high a flow becomes turbulent and pulls air into the pool, which is the same porosity you were trying to prevent. Our overview of gases used in welding goes further into why each mixture behaves the way it does.
Is MIG welding DCEP or DCEN?
This one silently ruins welds. Solid MIG wire with shielding gas runs DCEP — direct current, electrode positive, sometimes labelled reverse polarity. Self-shielded flux-cored wire runs DCEN, electrode negative. Most machines change this with a pair of cables behind a side panel, and most also print the correct arrangement on the inside of that door. If your welds look like they are sitting on top of the metal and spattering badly for no reason you can find, check the polarity before you change anything else.
Load the spool and set drive-roll tension
- Fit the spool so the wire comes off in the direction the drive rolls pull it, and set the spool brake just tight enough that the reel stops when you stop — loose enough and it overruns and birdnests, tight enough to drag and it strains the motor.
- Check the drive roll matches the wire: rolls are stamped with a size, and many are reversible with a different groove on each face. Solid wire uses a V-groove; flux-cored uses a knurled groove.
- Cut the first few inches straight with wire cutters and straighten the leading section by hand so it feeds into the liner without catching.
- Feed it through the guide, over the roll and into the liner. If you need real force, it is misaligned — stop and look rather than push.
- Set drive-roll tension to the lowest pressure that still feeds without slipping. Test it by letting the wire feed against a block of wood: it should stall and slip rather than keep pushing.
Keep unused spools in a sealed bag with a desiccant pack. Wire left on the machine in a humid garage picks up surface rust, and rusty wire makes porous welds. Wipe the first few feet with a clean dry rag before you run it.
How Do You Set Voltage and Wire Feed Speed?
Two dials do almost everything: voltage, and wire feed speed. Some machines label wire feed speed as amperage, because on a MIG machine they amount to the same control — feeding wire faster draws more current.
Start from the thickness
The rule of thumb is one amp per thousandth of an inch of material. Quarter-inch plate is 0.250″, so roughly 250 amps. Eighth-inch is 0.125″, so roughly 125 amps (Miller: setting the correct MIG parameters).
To turn that into wire feed speed, multiply the amperage by a factor for your wire diameter:
Wire feed speed starting points
| Wire diameter | Multiplier | At 125 A (⅛″ steel) |
|---|---|---|
| 0.023″ | × 3.5 | ≈ 440 ipm |
| 0.030″ | × 2.0 | ≈ 250 ipm |
| 0.035″ | × 1.6 | ≈ 200 ipm |
| 0.045″ | × 1.0 | ≈ 125 ipm |
These are starting points, not answers. Almost every machine also has a settings chart printed inside the wire compartment door for exactly this reason — use it, then tune by ear.
Then tune the voltage by ear and eye
Run a test bead on scrap of the same thickness. A correctly set MIG arc sounds like bacon frying — a fast, even, continuous crackle with no popping or surging.
- Voltage too low — the wire stubs into the plate and pushes the gun back, starts are poor, heavy spatter, and the bead sits up tall and narrow with the edges not tied in
- Voltage too high — the arc gets long and wandering, the puddle turns turbulent, penetration goes inconsistent, and on thin material you blow through
- Wire speed too low — the arc pops and burns back to the tip, sometimes fusing the wire to it
- Wire speed too high — the wire pushes into the plate faster than it melts and the gun kicks back at you
How to Actually Lay a Bead
Settings get you a working arc. Technique is what turns it into a weld.
Get comfortable first
Support your gun hand — rest your forearm or your little finger on the workpiece or a block. Nobody welds a straight line freehand in mid-air. Plan the whole travel before you strike the arc and make sure your body can follow it without repositioning halfway, because you cannot see well enough to improvise once the hood is down. Clamp the work; never hold it.
How much stick-out should you hold?
Stick-out is the distance from the end of the contact tip to the work, and roughly 3⁄8 of an inch is the number to hold. Too long and you lose heat, lose gas coverage and get porosity; too short and spatter blocks the nozzle and the tip burns back. Holding this distance steady is the single habit that separates a tidy bead from a lumpy one (Miller: MIG tips and techniques for beginners).
What gun angle — push or drag?
There are two angles to think about, and they are separate.
- Work angle — how the gun sits relative to the two pieces. On a flat butt joint, 90° to the surface. On a fillet weld in a corner, split the difference at about 45°
- Travel angle — how far the gun tilts along the direction of travel. About 15° is a good place to start
Push or drag is the argument you will find everywhere. Pushing — tilting the gun so it points in the direction you are travelling — gives a flatter, wider bead with less penetration and better gas coverage ahead of the puddle, and it lets you see where you are going. Dragging gives deeper penetration and a narrower, taller bead. For solid wire with gas on general work, push. For self-shielded flux-cored wire, drag — otherwise you weld over your own slag.
How fast should you travel?
Move so the leading edge of the puddle stays just ahead of the joint line. Too slow and heat piles up: the bead gets wide and tall, penetration drops because you are melting your own deposited metal rather than the base, and thin material burns through. Too fast and the bead goes narrow, ropey and convex, with the edges standing proud instead of blending in.
For most beginner work you are moving slower than feels natural and steadier than feels natural. A straight stringer bead is fine and often better than weaving; save weaving for filling a wide gap.
Starting, stopping and tacking
- Tack both ends and the middle before you weld anything long. Steel pulls as it cools and an untacked joint will close up or open out on you.
- Start the arc about half an inch ahead of where the weld should begin, then come straight back over it. That puts the cold, ugly start inside the finished bead.
- At the end, pause for a beat before releasing the trigger to fill the crater, then hold the gun over the finish for two or three seconds so the shielding gas keeps covering the cooling metal.
- On a long joint, weld in short sections alternating from one end to the other rather than running straight through, so the heat does not all go into one place.
Reading Your Weld: What Went Wrong and What to Change
This is the part that turns practice into progress. Cut your test coupons apart and look at them — a bead can look fine on top and have no penetration underneath.
MIG troubleshooting
| What you see | Likely cause | What to change |
|---|---|---|
| Tall, narrow bead with edges that do not blend | Voltage too low, or travel too fast | Raise voltage; slow down |
| Wide flat bead, burn-through on thin stock | Too much heat, or travel too slow | Lower voltage and wire speed; speed up; try a thinner wire |
| Small holes in the bead surface (porosity) | Gas not reaching the pool | Check the bottle is open and flow is ~20 CFH; check for a draught or fan; clear spatter from the nozzle; shorten stick-out; clean the metal |
| Heavy spatter everywhere | Voltage too low, wrong polarity, or dirty base metal | Check DCEP for solid wire; raise voltage; grind the joint clean |
| Bead sits on top with no fusion at the edges | Not enough heat, or arc aimed at the filler instead of the joint | More amperage; aim the wire at the joint line, not at the puddle you already made |
| Wire burns back and fuses to the contact tip | Wire feed speed too low, or stick-out too short | Increase wire speed; hold 3⁄8″; replace the tip once it is damaged |
| Feed stutters and the arc surges | Drive-roll tension, a worn liner, or a clogged tip | Back off tension; check for a flattened wire or a birdnest; replace tip and liner if worn |
| Undercut — a groove melted along the edge of the bead | Too much heat or too fast a travel | Lower voltage; slow down; reduce the work angle so you are not aiming into one side |
Practice That Actually Builds Skill
- Run beads on flat scrap with no joint at all until the bead width and ripple spacing stay even for the full length. Do not move on until this is boring.
- Weld two pieces flat side by side as a butt joint. Cut one apart afterwards and look at the back for penetration.
- Move to a T-joint fillet weld, which is where the 45° work angle starts to matter.
- Then go thin — sheet metal punishes everything you have not learned yet.
Sheet metal deserves its own approach, and we have a separate guide to welding sheet metal with a MIG welder if that is what brought you here.
Frequently Asked Questions
Can you MIG weld without gas?
Yes, but only with self-shielded flux-cored wire, which carries its shielding agents inside the wire itself. You cannot run ordinary solid MIG wire without gas — the weld will be porous and weak. Switching to flux-cored also means switching the machine to DCEN polarity and dragging rather than pushing the gun.
What thickness can a 140-amp MIG welder handle?
Using the one-amp-per-thousandth rule, 140 amps corresponds to roughly 0.140″, or a little over ⅛ inch, in a single pass. You can join thicker material by bevelling the edges and running multiple passes, but a 140-amp machine on 120 V is happiest between sheet metal and about ¼ inch.
Why does my weld look like it is sitting on top of the metal?
Almost always insufficient heat or the wrong polarity. Check that solid wire is running DCEP (electrode positive) first, then raise voltage and slow your travel. Also check you are aiming the wire at the joint line rather than at the puddle you have already made.
Do I need to clean metal before MIG welding?
Yes. MIG tolerates less contamination than stick welding. Grind or wire-brush away rust, paint, mill scale and oil for at least an inch either side of the joint. ER70S-6 wire copes with more than ER70S-3 does, but neither is a substitute for preparation — and never weld over galvanising or paint without a respirator and real ventilation.
What shade should my welding helmet be for MIG?
It depends on current: shade 7–10 below 60 amps, 10–12 from 60 to 160 amps, 11–13 from 160 to 250 amps, and 13–15 above that. Start dark and step lighter until you can see the puddle clearly without eye strain.
Sources
Every figure on this page was checked against the following. Where a number here differs from your machine’s manual, follow the manual — it is specific to your equipment.
- American Welding Society — welding lens shade chart (shade bands by amperage)
- ANSI Z49.1: Safety in Welding, Cutting and Allied Processes (free from AWS)
- Miller — MIG welding: setting the correct parameters (amperage rule, wire feed speed multipliers, fault diagnosis)
- Miller — understanding the basics of MIG welding for mild steel (wire classifications, shielding gas trade-offs)
- Miller — MIG welding tips and techniques for beginners (travel angle, stick-out, gas flow rate)
- OSHA 29 CFR 1910.252 — welding, cutting and brazing, general requirements
- Introduction to Welding, ch. 10.1 — history of GMAW (Open Washington)
Where to Go Next
MIG rewards repetition more than it rewards reading. Set your machine from the thickness, tune the voltage until the arc sounds like frying bacon, hold 3⁄8 inch of stick-out at about a 15° travel angle, and move slower and steadier than instinct tells you. Then cut your practice pieces apart and look at what you actually made — that feedback loop is what makes welders, and it is the step most beginners skip.